HyperLED
LED controller for ESP32-S3 boards. Inspired by the WLED project, but with different features.
Your 3D printer shows what it is doing with a bar of light. A plugin for HyperLED that displays the state of a printer running Klipper.
A 3D print often takes hours. Instead of watching the screen, you see from the light whether the printer is heating up, printing, paused or has an error. While printing, a green bar grows with the progress.
The plugin is a single file for HyperLED, my LED controller. You install it in the web interface without changing the firmware. It works with printers that run Klipper, a widely used software for 3D printers. I tested it with a Snapmaker U1 running the Extended Firmware by paxx12. On the U1 this firmware is essential, it does not work without it.
| Status | Active · version 1.7.1 |
|---|---|
| License | EUPL-1.2 |
| Part of | HyperLED |
| Printer | Klipper with Moonraker |
| Tested with | Snapmaker U1 + Extended Firmware (paxx12) |
| Colors | Freely selectable for each state |
| Installation | One file, no firmware update |
| Technology | Lua script |
This is a simulation with 48 LEDs. It plays through a whole print: heating up, printing, pause, finished, error and a lost connection.
Click a state, drag the progress slider, pick another direction or choose your own colors. The numbers below correspond to the live values the plugin reads from the printer.
Every five seconds the plugin asks the printer what it is doing. It turns the answer into a picture on the LED strip.
While heating up, the bar shows how far the nozzle and the heated bed are. The one that is furthest behind decides the length. While printing, the bar follows the progress and only grows, it never jumps back.
You can freely choose the color for every single state in the settings.
You choose how the bar grows: from the left, from the right, from both sides to the middle, or from the middle outwards.
The plugin recognizes by itself whether your HyperLED has a simple strip or a panel connected and fills the strip in order.
klipper-status.json from the latest version.Afterwards the live values on the plugin card show what the plugin is currently reading from the printer. That helps you find a wrong address quickly.
The pictures show the HyperLED interface in English. It is also available in German.
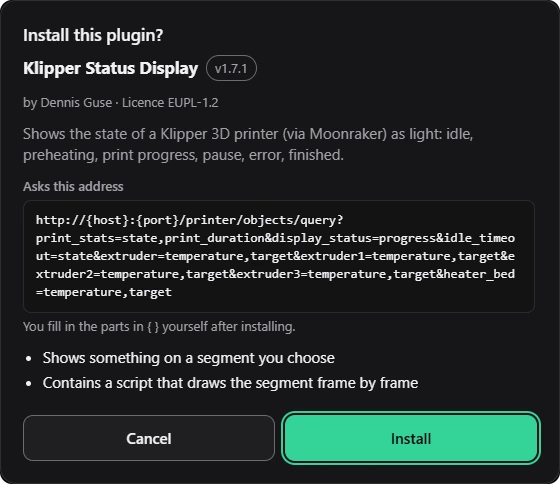
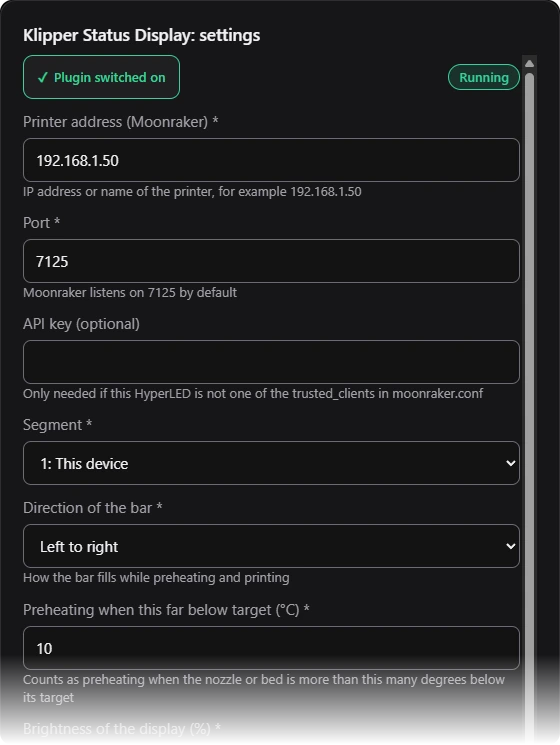
On some strips that run on USB without their own power supply, LEDs behind the end of the bar can flash briefly. That comes from power and data signal and not from the plugin. A stronger power supply helps.
On the Snapmaker U1 the plugin only works with the Extended Firmware by paxx12. It is an unofficial community firmware and not from Snapmaker. Read its notes before you install it.
Showing the state of a printer as a bar of light is the idea of drc85: Snapmaker U1 SnapStatus on MakerWorld. It also has the 3D-printed parts for the bar.
My plugin is a new development for HyperLED and contains no code from that project. If you use WLED instead of HyperLED, have a look at drc85's project.
LED controller for ESP32-S3 boards. Inspired by the WLED project, but with different features.
Firmware for the slaves in HyperLED's master/slave network.