First light
Now tell HyperLED which LEDs you connected. This takes two minutes and is done in the web interface.
1. Enter your LED hardware
Open Devices → LED hardware.
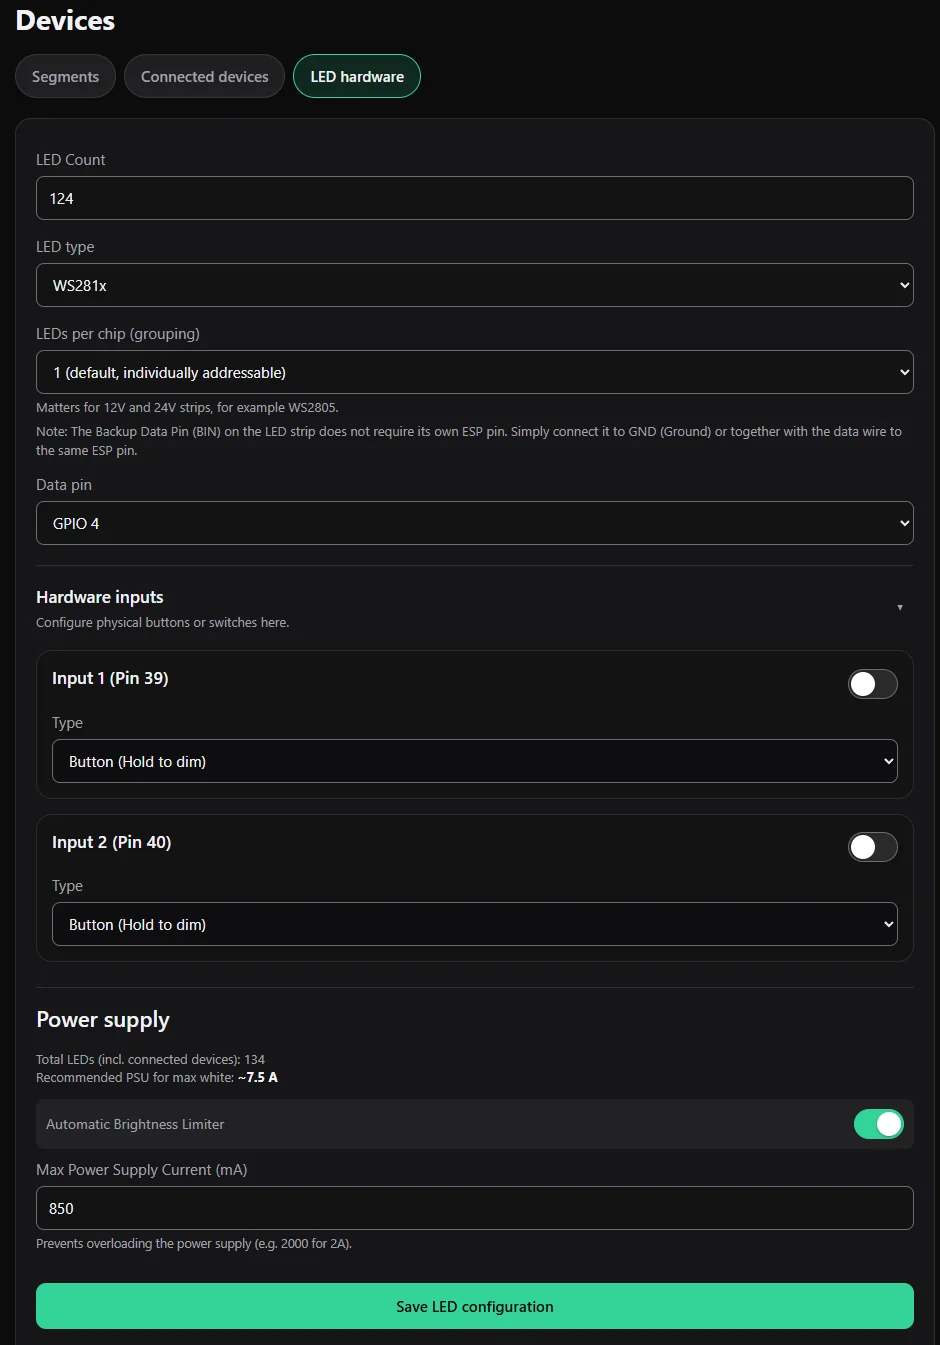
| Setting | What to enter |
|---|---|
| LED Count | How many LEDs your strip has (for example 60 or 144). |
| LED type | The chip of your strip. For the usual WS2812B choose WS281x (listed under Digital LEDs (1-Wire)). Other groups: Digital LEDs (SPI / 2-Wire) for strips with a clock line (APA102 and similar), Analog LEDs (PWM) for simple one- to five-channel strips, and Scan Matrix Panels for HUB75 panels. |
| LEDs per chip | Leave at 1. Only change it for 12 V or 24 V strips where several LEDs share one chip (for example 3 or 6). |
| Data pin | The pin you wired the strip to. The default is GPIO 4. |
2. Protect your power supply
Under Power supply you see how many LEDs HyperLED knows about and which supply it recommends for full white.
- Switch Automatic Brightness Limiter on.
- Enter Max Power Supply Current (mA): the current your supply can safely deliver to the strip, for example 2000 for a 2 A supply.
HyperLED now estimates the current of everything that is lit and lowers the brightness automatically before the limit is crossed. If your LEDs look dimmer than expected at full brightness, this limit is the reason; raise it only if your power supply and wires can take it.
3. Save
Press Save LED configuration. The controller may restart for a moment.
4. Light them up
Go to the Light page. Switch the segment on (the toggle next to its name), pick an effect, for example Rainbow, and move the Brightness slider.
If nothing lights up or the colours are wrong, check Troubleshooting.
Optional: physical buttons
Two inputs for a push button and a switch can be switched on in the same page under Hardware inputs. See Buttons and switches.