Plugins
A plugin is a small file that gives HyperLED a new ability without a firmware update. A plugin can read something from the network and show it as light on one segment. For example:
- the progress of your 3D printer as a growing bar,
- a segment that changes colour with the outdoor temperature,
- the state of a service in your home network, green when it runs and red when it does not.
HyperLED itself knows nothing about these things; the plugin alone defines what happens. You can add, set up and remove plugins whenever you like, and they survive firmware updates and backups.
Example: Klipper Status Display
The ready-made plugin Klipper Status Display shows the state of a Klipper 3D printer on an LED strip: idle, preheating, a progress bar while printing, pause, finished and error. It is a good example of what plugins can do, and the screenshots below show it.
Add a plugin
- Open Settings → Plugins and press + Add plugin.
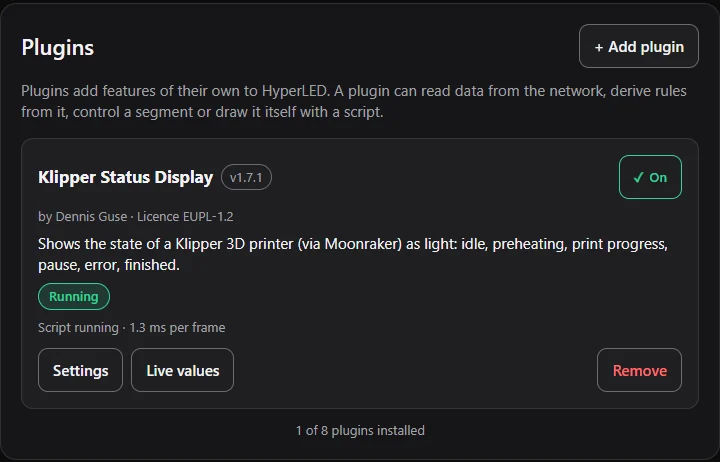
- Choose a plugin file (
.json) or paste the address of one (for example the file attached to a GitHub release). HyperLED loads it for you. - HyperLED checks the plugin completely before anything is saved and shows a preview: who made it, which address it will ask and what it wants to do (draw on a segment, run a script). Read this carefully: a plugin may only ask the address shown there. Press Install to save it, or Cancel.
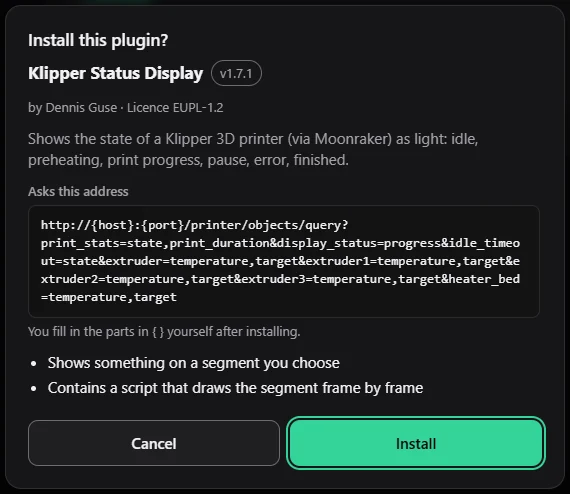
Set up and switch on
After installing, the plugin's settings open. They are different for each plugin. For the Klipper plugin you enter the printer's address, choose the segment and, if you like, the colours.
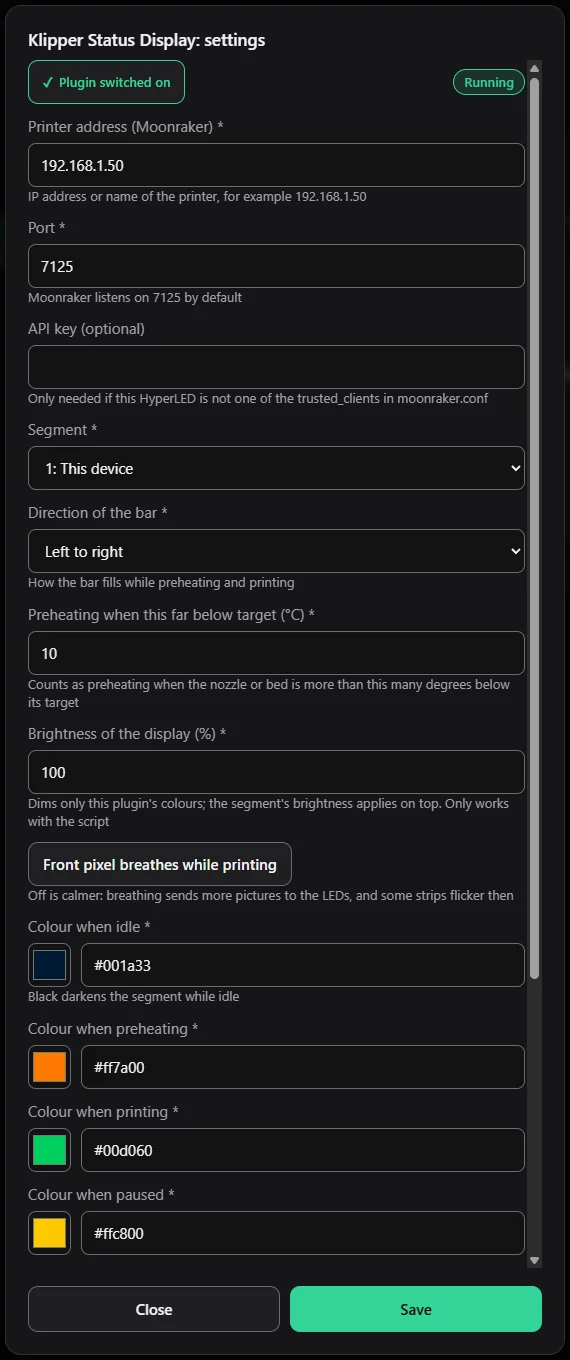
- Required fields are marked with a star (
*). - Segment: pick the segment the plugin draws on. Only one plugin can run per segment.
- Passwords are never shown again; an empty field keeps what is stored.
- Switch Plugin switched on to start it. If something is missing, the reason is shown and the plugin stays off.
States
The card in the plugin list shows what the plugin is doing:
| State | Meaning |
|---|---|
| Off | Switched off. The segment is yours. |
| Waiting for an answer | Switched on, the source has not answered yet. Wait a few seconds. |
| Running | Answers arrive and the plugin shows something. |
| No connection | The source did not answer (for example the printer is off). Check the address. The plugin shows what it provides for this case and keeps trying. |
| Not compatible | The plugin needs a newer firmware or plugin interface. It stays stored and runs by itself after a suitable update. |
| Invalid | The stored file is damaged. Remove it and install it again. |
The light page and your settings
While a plugin draws on a segment, the Light page tells you at the top. The buttons open the plugin's Settings or Pause it:

A plugin only lays itself over the segment while it draws and stores nothing. Your own effect, colour and brightness settings stay as they were: pause or remove the plugin and everything is back immediately. Brightness is always yours; a plugin cannot change it.
Live values
Live values on the plugin's card shows what it reads right now and who is drawing the segment. It is the quickest way to find a wrong address or a missing value.
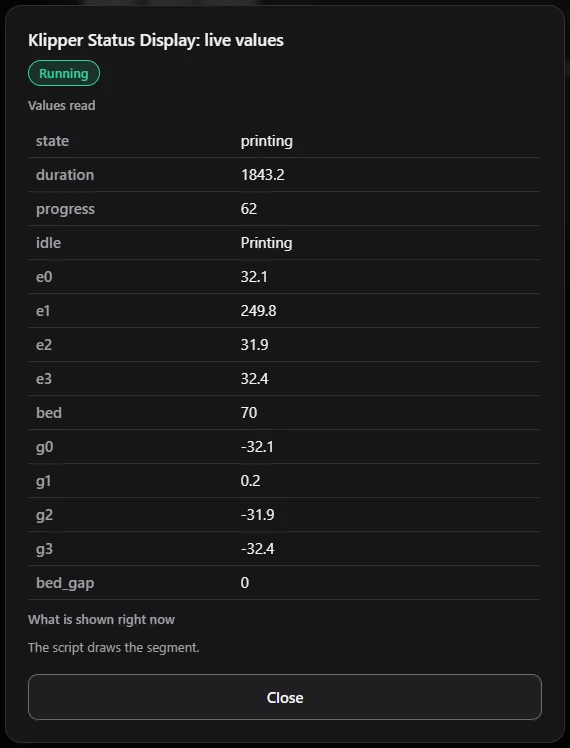
Show plugin values on a panel
The values of a running plugin can be shown in a Text or Marquee element on a panel by writing {plugin-id.value} in the text, for example {klipper-status.progress}. See Panels and elements.
Update and remove
- Update: install the new version like a new plugin. With the same id it replaces the old one and keeps your settings.
- Remove: deletes the plugin and its settings. The segment is yours again.
- Backup: plugins and their settings (including passwords) are part of a backup.
Write your own
A plugin is one JSON file with settings, an address to ask, a few rules, and if you like a small Lua script that draws the segment pixel by pixel. The details are in the repository:
- Using plugins: the full guide for users
- Developing plugins: file format, expressions, examples
- Plugin scripts: the Lua scripts
- Example plugins and a JSON schema