Panels and elements
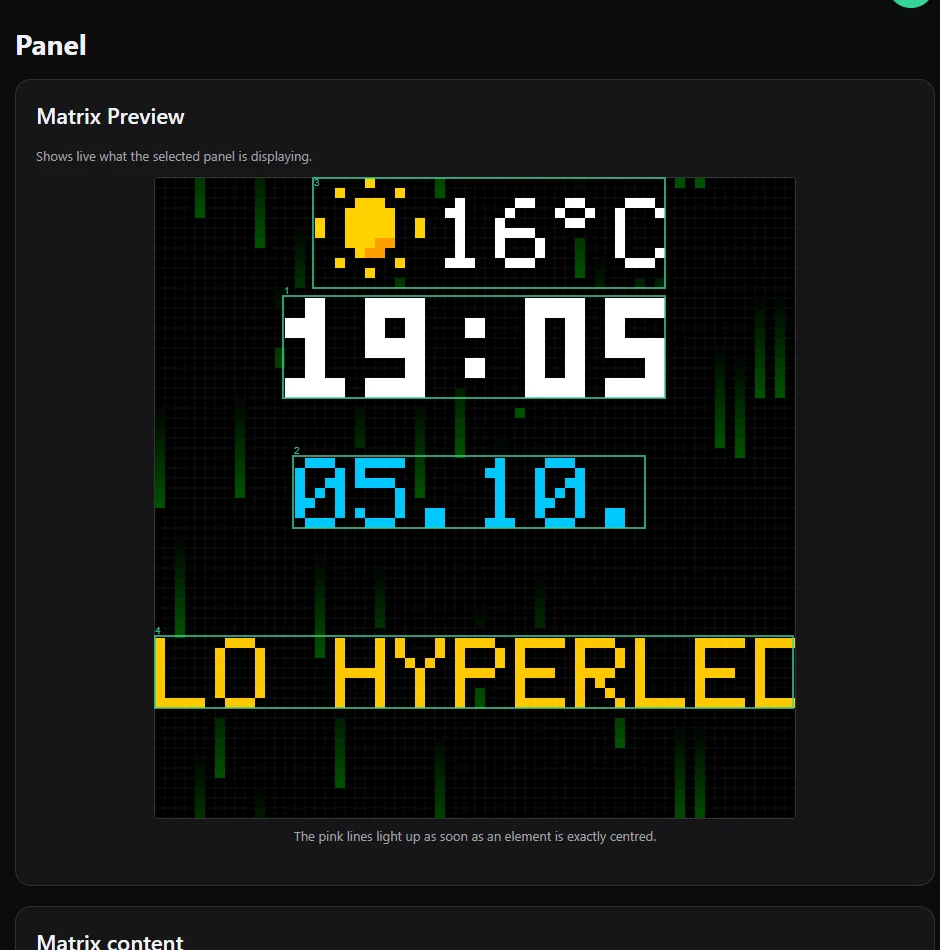
An LED panel (HUB75, for example 64 × 64 pixels) or a matrix (an LED strip laid out in rows) is more than a lamp: it can show a clock, the date, text, scrolling text, the weather and pictures. You place these elements freely on it, in the browser.
Set up a panel
A HUB75 panel
- Wire the panel to an ESP32-S3 board. The pinout is fixed (14 signals); the web interface lists it under Devices → Connected devices for a device whose LED type is HUB75.
- In the web interface open Devices → Connected devices and set the board's LED type to HUB75, enter the panel's Width and Height, and press Send configuration to the device. If the picture ghosts or flickers, change the Driver chip.
- Open Devices → Segments and make sure there is a segment on this device (see Effects, colours and segments).
- On the Light page select the panel's segment and choose the effect Clock / Text.
A panel on a Slave is drawn by the Slave itself, so the clock, text and weather run smoothly without loading the Master (see Several devices).
Very large panels can need more memory than the ESP32-S3 has. The firmware then refuses to start the panel instead of crashing; choose a smaller panel or fewer colour levels.
A matrix made from a strip
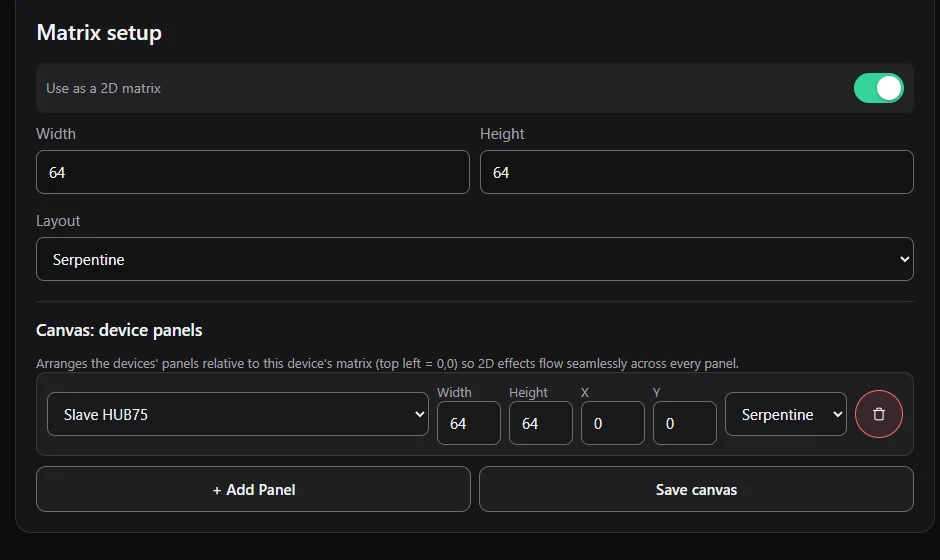
If your strip is laid out in rows, open Devices → LED hardware → Matrix setup, switch Use as a 2D matrix on and enter Width and Height. Choose the Layout: Serpentine (every second row runs backwards, the usual zig-zag wiring) or Progressive (every row runs the same way). With several panels, Canvas: device panels arranges them relative to each other so that 2D effects flow across all of them.
Place elements
Open the Panel page. Elements can be placed as soon as the selected panel's segment uses the Clock / Text effect.
- The Matrix Preview shows the panel live. Drag an element in the preview to move it. Pink guide lines light up when an element is exactly centred.
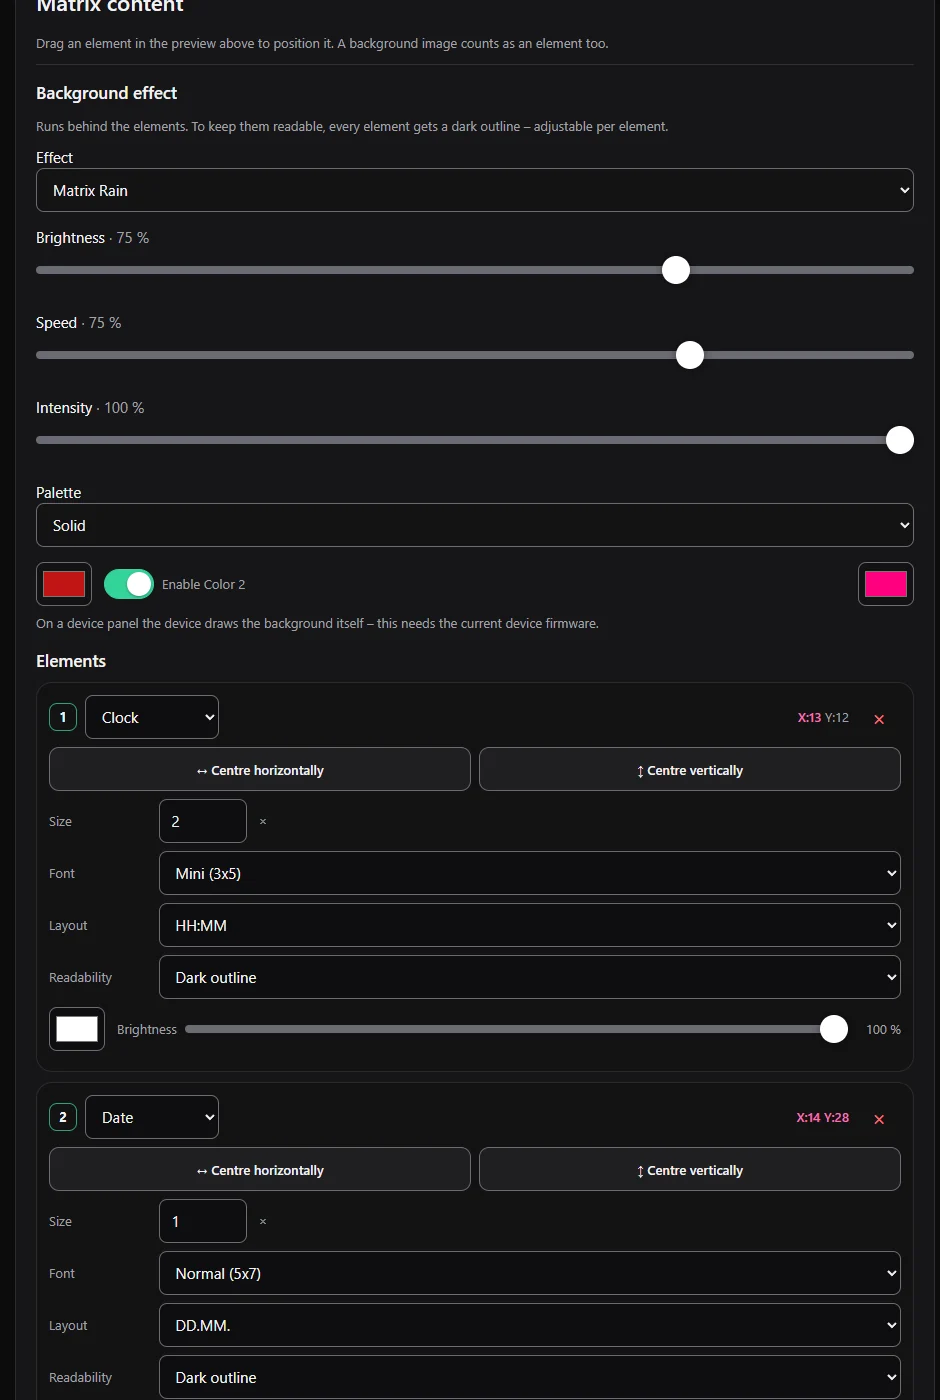
- Under Elements press + Add Element and choose its type. Every element has its own settings and an × to remove it.
- Centre horizontally / vertically snaps the element to the middle.
The element types
| Type | What it shows | Options |
|---|---|---|
| Clock | the time | format: HH:MM, HH:MM:SS or 12 h with AM/PM |
| Date | the date | formats such as DD.MM., DD.MM.YYYY, YYYY-MM-DD, MM/DD/YYYY or with the weekday |
| Text | a fixed text | the text itself |
| Marquee (scrolling text) | text that scrolls through a window | text, direction (left or right), length of the window in pixels, speed |
| Analog clock | a round clock face | style (classic, minimal, with dots and second hand, cross) and diameter |
| Weather | icon and/or temperature | layout (icon + temperature, only icon, only temperature), icon size (11 × 11 or 16 × 16) and colours (own colours or the element's colour) |
| Image | a picture | the picture and its size |
All elements also have:
- Size: a multiplier for larger letters.
- Font: Normal (5×7) or the smaller Mini (3×5). The fonts have capital letters, digits and basic punctuation.
- Colour and Brightness: its own, on top of the segment's brightness.
- Readability: how the element stays readable in front of a background effect: no help, a dark outline (the default) or a dark box.
Weather
The Weather element needs a location. At Weather Element Location type your town and press Save. The weather comes from Open-Meteo and needs no key or account. The temperature is the current value; the icon covers sun, clouds, rain, snow, thunderstorm and more, by day and night.
Texts that show live values
In Text and Marquee elements you can write a placeholder like {klipper-status.progress}: it is replaced by the current value of a plugin. While the value is unknown, -- is shown. The editor offers a list of the available values.
Background effect
Under Background effect an effect runs behind the elements: fire, plasma, Matrix rain, rainbow and so on, with its own brightness, speed, intensity, palette and colours. The elements keep a dark outline so they stay readable. Choose No background to switch it off. A panel on a Slave draws the background itself and needs the current Slave firmware for this.
Pictures and pixel art
- Upload Background Image: choose a picture. It is scaled to your matrix and used as a background element. Background images are limited to 64 × 64 pixels.
- Paint Background Image: draw directly on a grid in the browser, choose a colour per pixel, then Use as Background. Load from Matrix copies what the matrix currently shows, Clear starts again.